

Search Re-ranking
Search re-ranking applies your Dynasort recipes to your storefront’s search results. Shopify still decides which products match a shopper’s query (including typo tolerance and synonyms), and your recipe decides what order they appear in, so your best sellers, high-margin items, or in-stock products rise to the top instead of whatever the default relevance happens to surface.
Real store data shows why order matters: in one large catalog we analyzed, nearly half of all search result clicks landed past the third position. Shoppers scroll, and what they find there is up to you.
How it works
Section titled “How it works”Think of search as two separate jobs:
- Matching stays with Shopify. A query like “jacket” matches the same set of products it always did.
- Ordering moves to your active search recipe. The matched products are re-scored by the recipe’s attributes (sales, conversion rate, inventory, and so on) and returned in that order.
Because matching is untouched, shoppers never see products that don’t fit their query, and they never lose results they would have found before.
Tie-breakers and thin data
Section titled “Tie-breakers and thin data”When several products score the same (common on newer stores with little sales history), the recipe’s tie-breaker decides their order. Search recipes default to Shopify relevance as the tie-breaker, which means: with no data at all, your results look exactly like Shopify’s, and as data accumulates your recipe takes over gradually. No cliff, no scrambled results on day one.
Where it appears
Section titled “Where it appears”Re-ranking covers both storefront search surfaces:
- The search results page: the full result grid, with pagination.
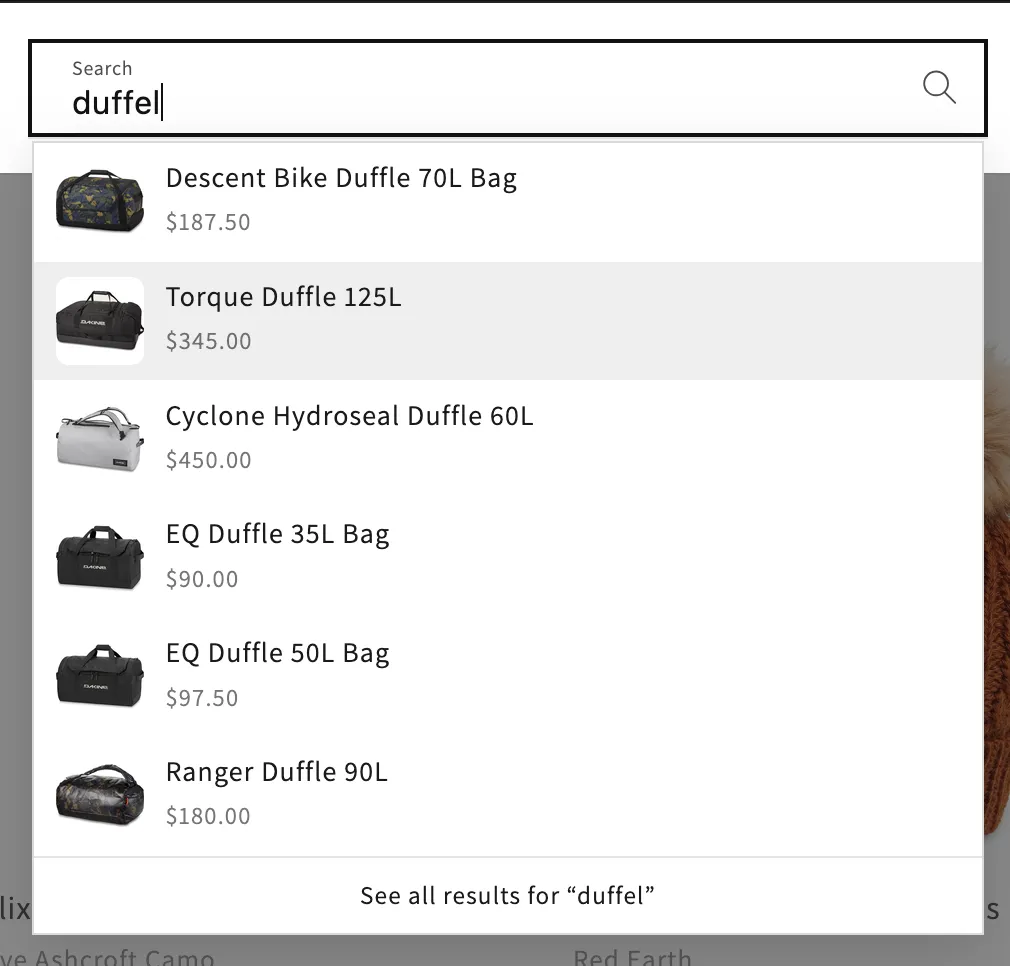
- The live search dropdown: the suggestions that appear as a shopper types, re-ranked by the same recipe.
The live search embed works in one of two modes: it replaces your theme’s dropdown with Dynasort’s own, or it keeps your theme’s dropdown (tabs, suggestions, filters, prices) and reorders only the products inside it. See Re-rank the theme’s own dropdown.
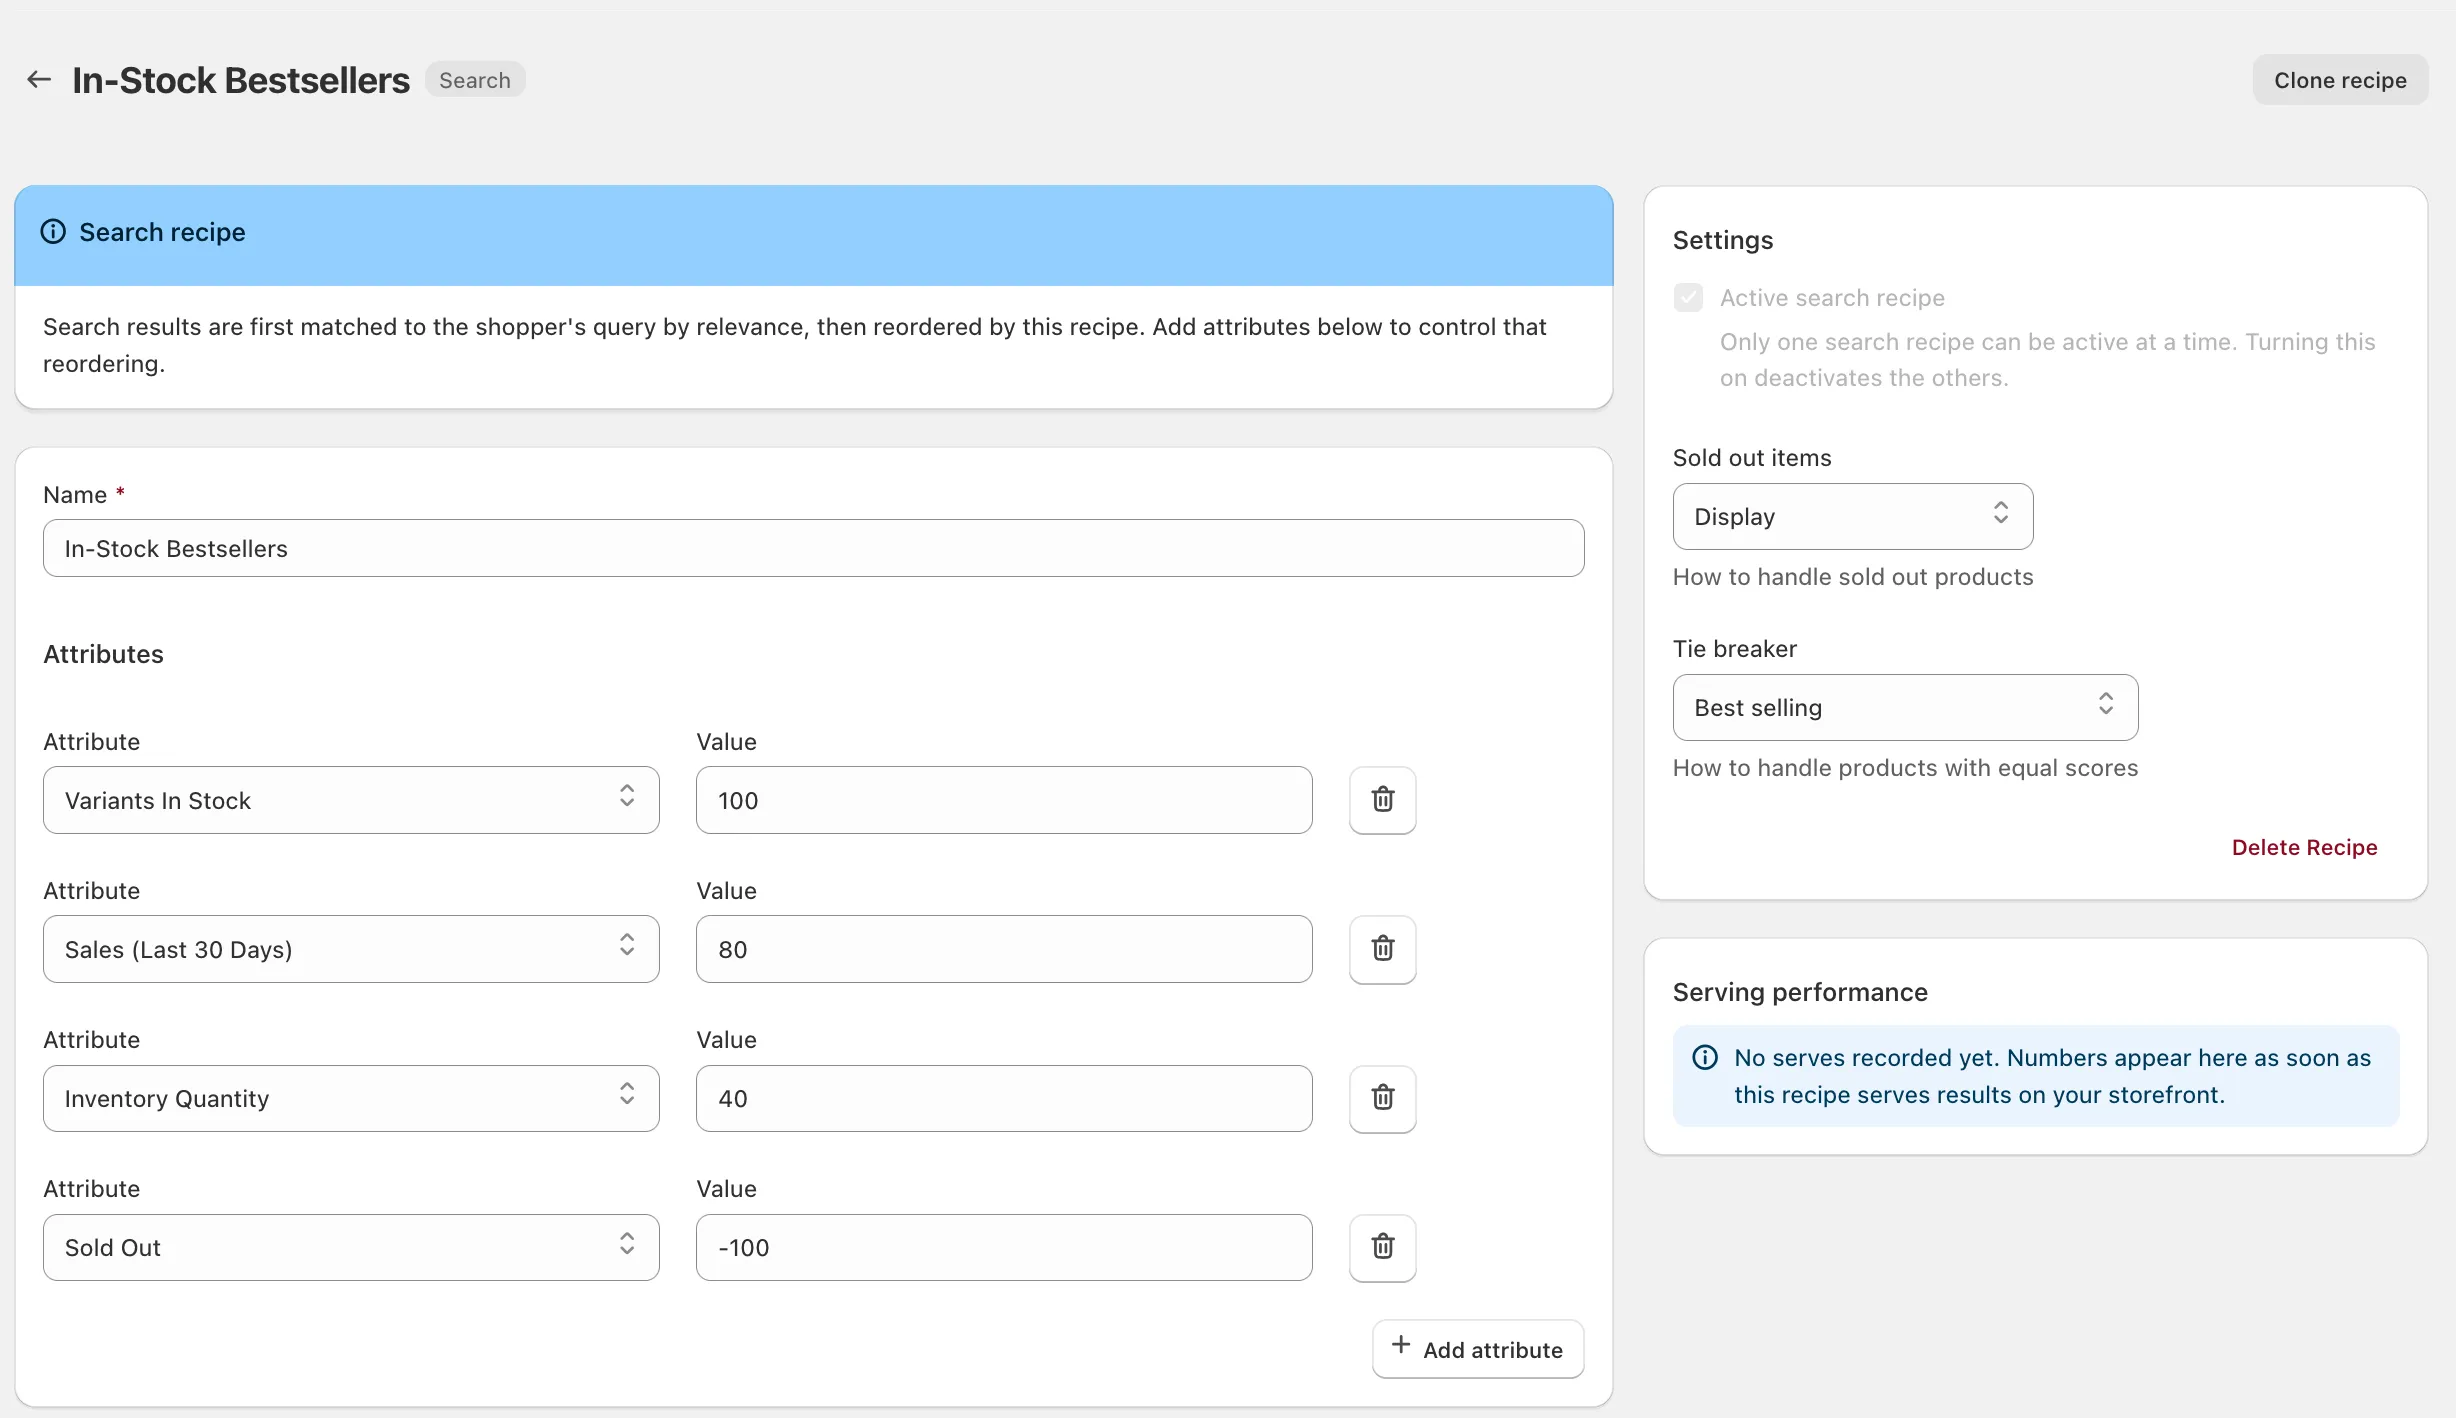
- Create a search recipe. On the Recipes page, choose Add recipe → Search recipe. Pick the attributes that define “best” for your store and weight them. Dynasort seeds sensible defaults you can start from.
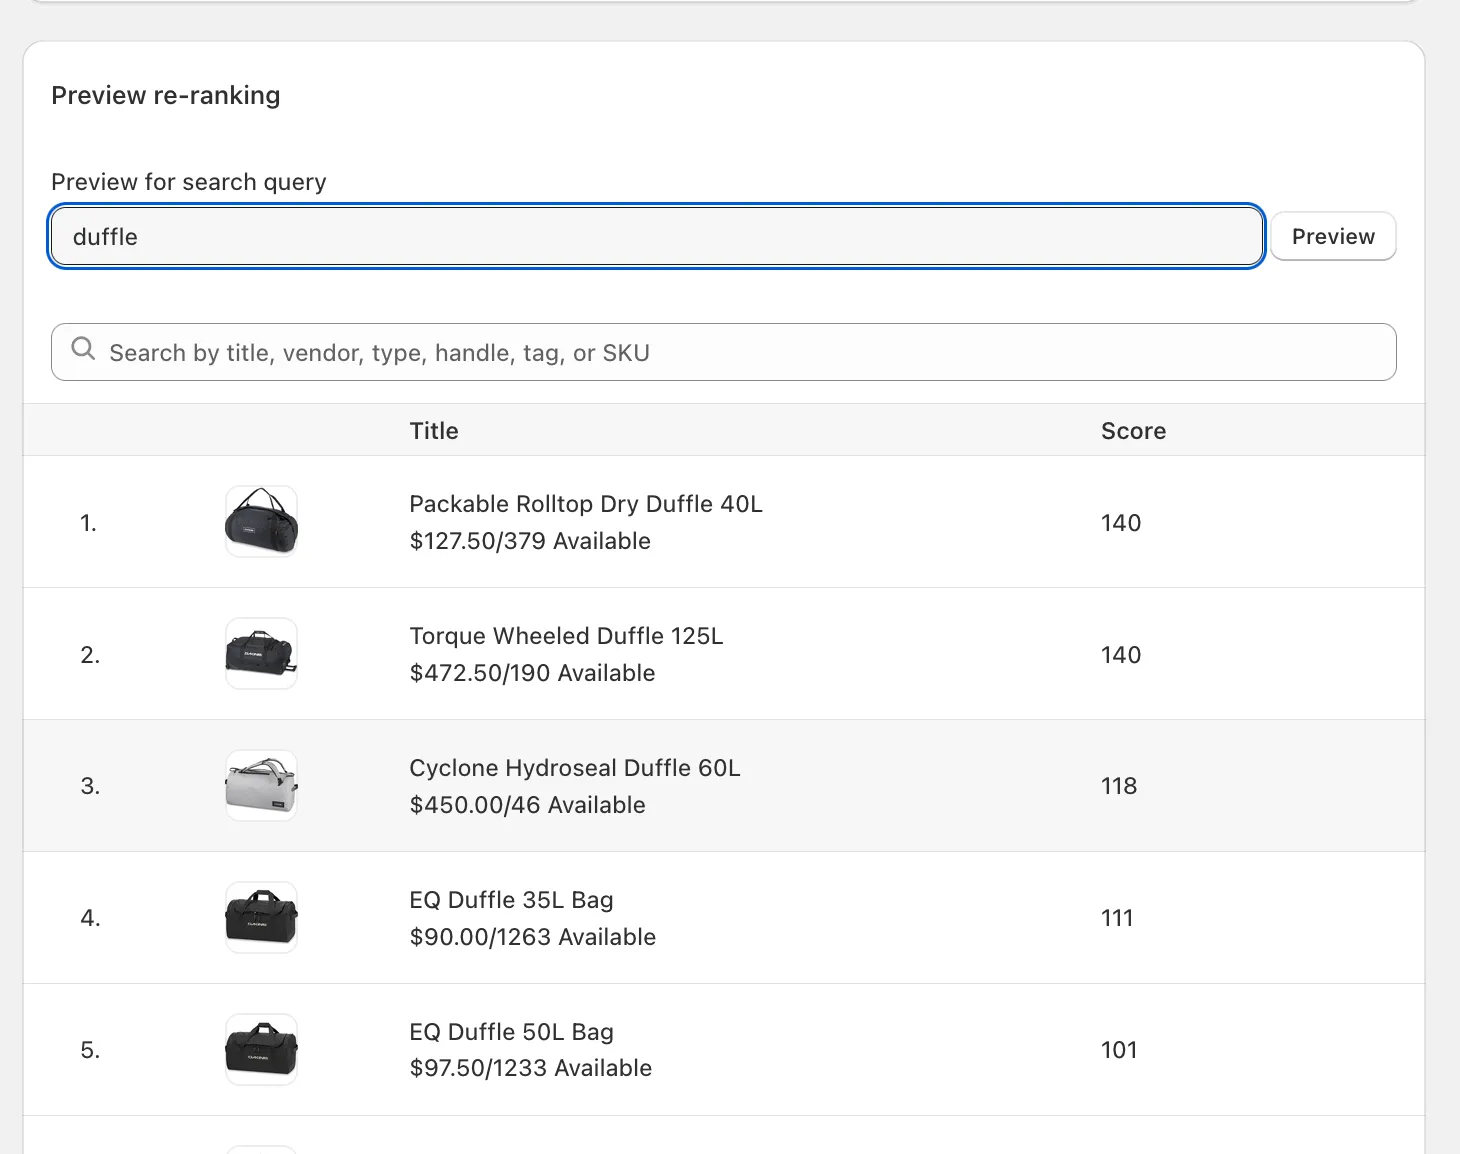
- Preview the re-ranking. In the recipe editor, type any query into Preview re-ranking to see exactly how results will be ordered, before anything is live.
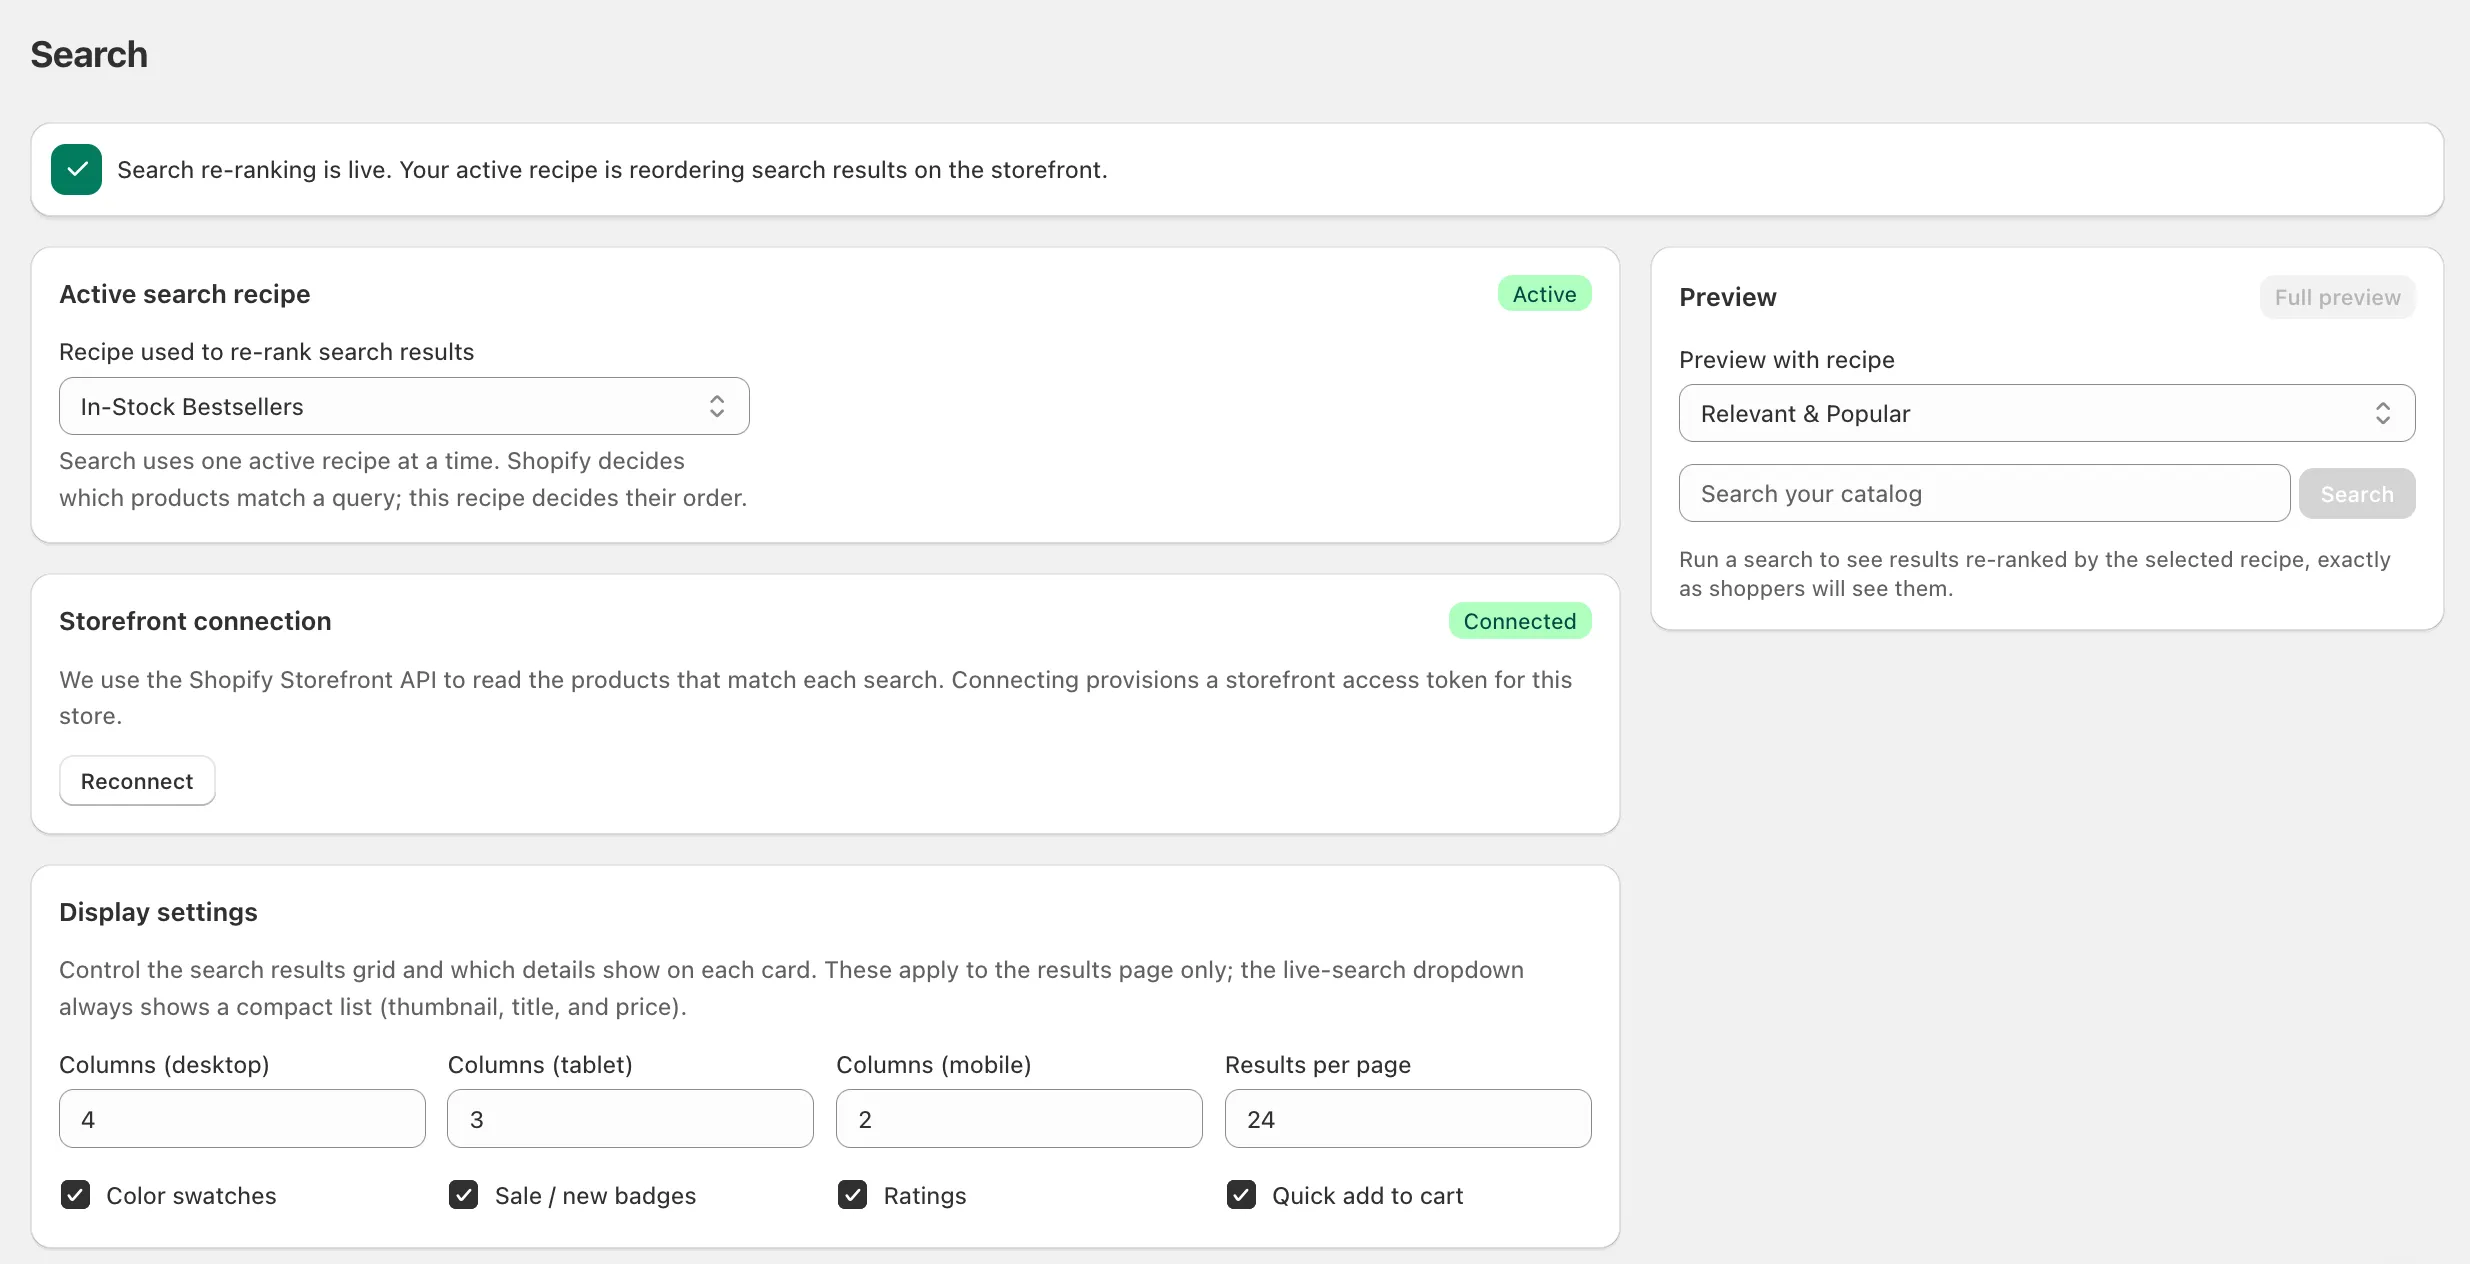
- Activate it. On the Search page, choose your active recipe (search uses one active recipe at a time) and connect the storefront. The status banner tells you when everything is ready.
- Add the storefront pieces in your theme editor. On the search template, add the Dynasort Search Results app block (in the block picker under Apps) and remove or hide your theme’s own results section. Then, under Theme settings → App embeds, toggle on Dynasort Live Search so the typeahead dropdown is re-ranked too; set its hide selector for your theme per Live Search theme selectors.
Display settings
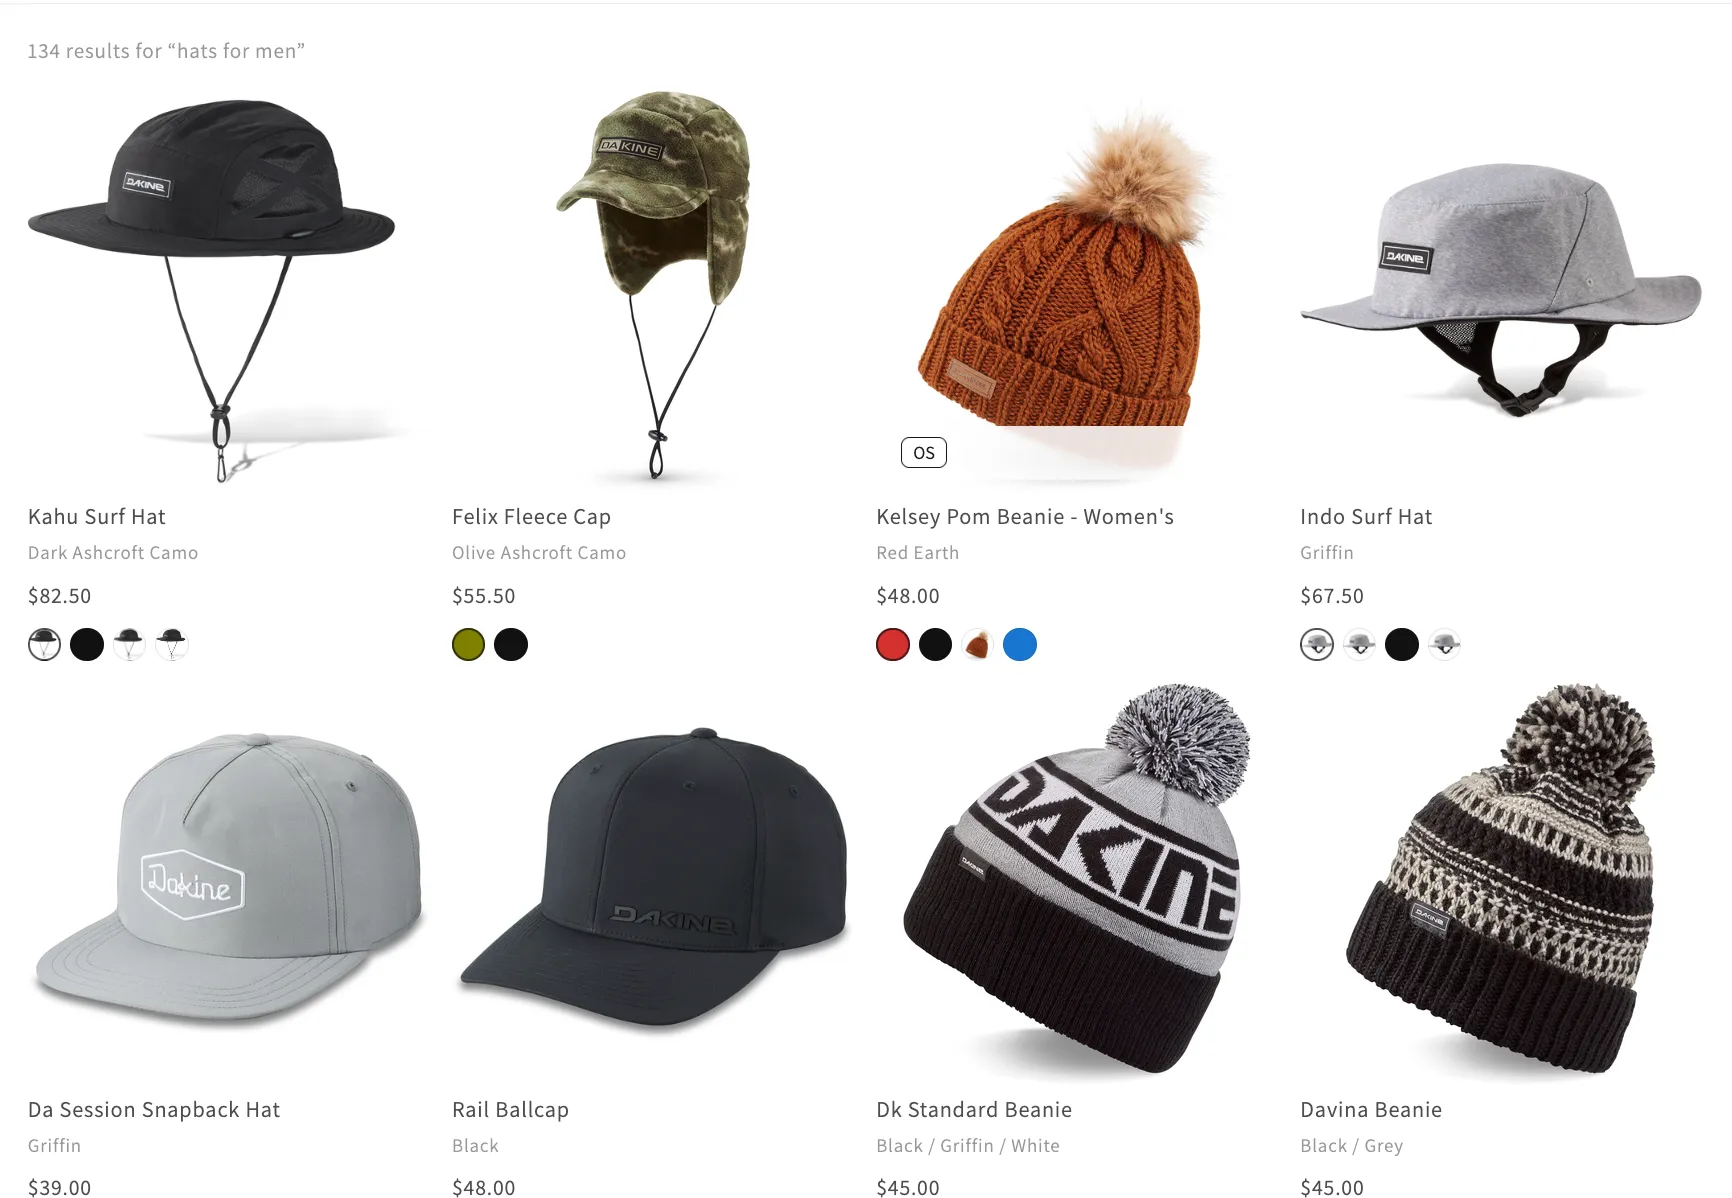
Section titled “Display settings”The Search page controls how the results grid looks: columns per device, results per page, and which details show on each card (color swatches, sale and new badges, star ratings, quick add-to-cart).
These settings apply to the results page grid. The live search dropdown always uses a compact list (thumbnail, title, price) designed for fast scanning.
Variant swatches
Section titled “Variant swatches”Swatches can render as color dots or as variant images, small thumbnails of each color’s own product photo. Variant images are the better choice when your color names are brand-specific (“Preloved Ink”) rather than plain colors, or when the product photo says more than a dot ever could.
Swatch option name pins the swatch row to one specific option, usually Color. When it’s set, products without that option show no swatches at all. That’s the tool for catalogs where some products use options for configuration rather than color: a shirt with a Color option gets its swatch row, while a golf club whose options are shaft and loft combinations gets a clean card that clicks through to the product page. Leave the field empty and Dynasort picks a color-like option automatically.
Savings note
Section titled “Savings note”The Savings note adds the discount next to the price on marked-down products: “(Save $60.00)” as a dollar amount, or “(Save 40%)” as a percentage. When the discount varies across a product’s variants, the wording switches to “(Save up to $107.50)”. Products that aren’t discounted show nothing, so the note never renders a zero.
Custom badges
Section titled “Custom badges”Beyond the built-in Sale, New, Bestseller, and Low stock badges, you can define your own. Each badge pairs a label and colors with one matching rule:
| Match by | The badge appears on products that… |
|---|---|
| Tag | carry the tag you specify |
| Title contains | have the text anywhere in their title |
| Vendor | are from that exact vendor |
| Product type | have that exact product type |
| Metafield | have a matching value in the metafield you name (namespace.key) |
Metafield matching also understands badge metaobjects. If your store manages badges as a metaobject list on each product (a common pattern for “Preorder”, “Coming Soon”, or promo badges), a rule can simply name the badge, for example match value Preorder on product.badges, and Dynasort resolves the reference for you. New badge definitions and label edits are picked up automatically.
Hiding prices until a click (MAP)
Section titled “Hiding prices until a click (MAP)”If some of your products can’t display an advertised price, brand MAP agreements being the usual reason, Price visibility hides the entire price block (price, compare-at strike-through, and the savings note) on flagged products behind a “Click to Reveal Price” control. Flagging is metafield-driven: point the setting at the metafield your product pages already use for this, and search result cards follow the same rules. In the live search dropdown, flagged products show the reveal text in place of a price.
Measuring results
Section titled “Measuring results”Every time Dynasort serves a search results page, it records what was served. From there it tracks what shoppers did with it:
- Serves: how many times the recipe ordered a results page.
- Clicks and CTR: clicks on served results, with the position that was clicked.
- Adds: served products added to the cart, whether from the result card or the product page, within the same visit.
- Checkouts: visits where a served product was added and the shopper went on to check out.
You’ll find these numbers on the search recipe’s page: totals in the sidebar and a day-by-day table below the editor. They’re the foundation for comparing recipes, and for the A/B testing of search recipes we’re building toward.
Customizing the look (CSS)
Section titled “Customizing the look (CSS)”The storefront pieces ship without !important rules, so your theme’s CSS can override anything. Useful hooks:
Results grid (.dynasort-search): the root element exposes CSS custom properties you can set from your own stylesheet:
.dynasort-search { --ds-cols-desktop: 5; /* columns per breakpoint */ --ds-gap: 1.5em; /* grid gap */ --ds-radius: 12px; /* image corner radius */ --ds-aspect: 4 / 5; /* card image aspect ratio */}Element classes follow a consistent naming scheme: .dynasort-search__card, __media, __title, __price, __badges, __swatches, __pager, __summary, __empty, plus __save (the savings note) and __price-reveal (the MAP reveal control).
Live search dropdown (.dynasort-predict-*): .dynasort-predict-panel (the container, solid white by default), .dynasort-predict-item, .dynasort-predict-thumb, .dynasort-predict-title, .dynasort-predict-price, .dynasort-predict-all.
- Start with the seeded default recipe and watch the serving numbers for a week before tuning weights.
- If your store is new and everything ties, that’s fine: the Shopify-relevance tie-breaker keeps results sensible until your data differentiates them.
- Sold-out products can be hidden or shown per recipe; hiding them is usually the biggest single win for search conversion.
Frequently asked questions
What does Dynasort search re-ranking do?
It changes the order of storefront search results without changing which products match. Shopify still decides what matches a query, including typo tolerance and synonyms, and your active Dynasort search recipe decides the order, so best sellers, high-margin or in-stock products rise to the top.
Will re-ranking remove or add products from search results?
No. Matching is untouched, so shoppers see exactly the products they would have found before, in a different order. The only optional exclusion is hiding sold-out products, which you set per recipe.
What happens on a new store with little sales data?
Search recipes default to Shopify relevance as the tie breaker. With no data, results look exactly like Shopify's, and the recipe takes over gradually as data accumulates. There is no cliff on day one.
Which search surfaces are re-ranked?
Both: the full search results page with pagination, through the Dynasort Search Results app block, and the live search dropdown that appears as a shopper types, through the Dynasort Live Search app embed.
What theme setup does search re-ranking need?
Two steps in the theme editor: add the Dynasort Search Results app block to the search template and hide the theme's own results section, then turn on the Dynasort Live Search app embed under App embeds and set its hide selector per Live Search theme selectors. After that, recipe changes never touch the theme again.
Can I preview re-ranked results before going live?
Yes. In the search recipe editor, type any query into Preview re-ranking to see the exact order the storefront will serve.
How does Dynasort measure search performance?
Every served results page is recorded, then serves, clicks with position, click-through rate, adds to cart and checkouts are tracked. Attribution is conservative: a click counts only on a served result, an add only for a served product in the same visit, and a checkout only when a served product was added first.
Can I hide prices on MAP-restricted products in search results?
Yes. The Price visibility setting hides the price block behind a 'Click to Reveal Price' control on products flagged by a metafield you choose, on both the results grid and the live search dropdown.
How many search recipes can be active?
One at a time. Activating a different recipe deactivates the previous one, and setting the active recipe to none turns search re-ranking off.